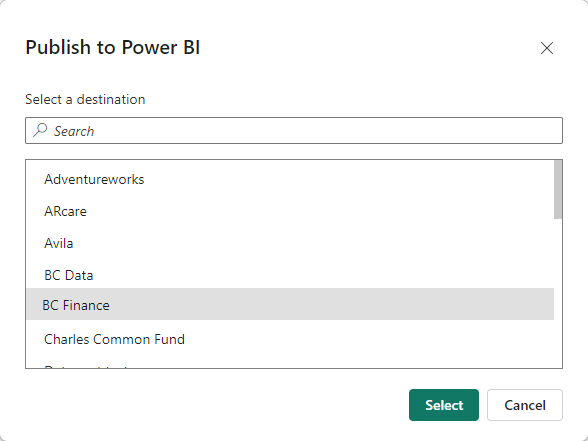
Many organizations using Microsoft Dynamics 365 Business Central want to use Microsoft Power BI to create reports. Users in those organizations may have seen or heard about the integration possibilities. This article will walk through integrating Power BI and Business Central, as well as how to create reports with Power BI that display Business Central data.
This article makes these assumptions:
- You are using Business Central or interested in doing so.
- You are ready to start building Power BI reports for Business Central.
Adding Power BI Reports to Business Central
The first step is to set up the integration with Power BI so reports can appear on the Business Central landing page. To do that, scroll down the page until you see Power BI, as shown in the next image.
 Figure 1 Business Central landing page displaying the Power BI reports part.
Select Get started with Power BI. The welcome page appears.
 Figure 2 Power BI report setup welcome page.
Select Next. On the Check Your Power BI License page, the wizard will verify you have a Power BI Pro or Premium license. These licenses must be purchased and assigned to users ahead of time. To verify you have a license, select the Go to Power BI home page link. Select the Sign in option. Then, select Next.
On the next window, you are notified that a demo report will be uploaded for you. Select Next.
The last window tells you that you are ready to start deploying Power BI reports to Business Central. Select Finish.
After what could be several moments, a demo report is displayed.
 Figure 3 Power BI demo report.
At this point, you can select other Power BI reports to display. Select the down arrow and you will get a menu.
 Figure 4 Power BI reports to display menu options.
Here are some of the options:
Select Report – Displays a list of reports uploaded to the Power BI web service.
Upload Report – Provides the option to upload a PBIX file created using Power BI Desktop.
If you don’t have any reports but would like more samples, use the Search button to look for “Appsource.”
 Figure 5 Conduct a search for Appsource.
Select “Microsoft Appsource Apps” from the list. You will be directed to the Microsoft AppSource website. There are several Power BI apps. Some have no cost and some require a subscription. To select a complimentary one, search for Dynamics 365 Business Central – Finance.
 Figure 6 Dynamics 365 Business Central - Finance Appsource listing.
Select Get it now and enter your login. Depending upon what you select, you will be asked to walk through some steps.
The app you select will install into the Power BI web service.
 Figure 7 Showing the Dynamics 365 Business Central - Finance app within the Power BI Apps list.
Select the app by clicking on the name and the app will open.
 Figure 8 Dynamics 365 Business Central - Finance app opened, displaying dashboard modules.
Select the Microsoft Dynamics 365 Business Central – Finance folder as shown in the image.
 Figure 9 The app folder is selected.
From here, you need to connect the report to your Business Central data. When you select “Connect your data” from the message showing near the top of the window, a pop-up window will display where you enter your company name and environment.
 Figure 10 Showing where to enter your company name and environment on the pop-up window.
Select Next and you will be prompted for security information. The default method is OAuth2. Select Sign in and connect. The report will be refreshed with your data. You may close Power BI or leave it open.
Now, go back to Business Central. Select the Power BI dropdown and choose the “Select Report” option. Select the sample report. You will see the report appear in Business Central.
 Figure 11 How the report should appear in Business Central.
To see other reports, select the Power BI dropdown and click on “Previous” or “Next.” You also may want to select the “Expand” option to make the report larger. Notice the tabs at the bottom.
 Figure 12 Showing the tabs at the bottom of the report.
Building a Power BI Report With Business Central Data
Now that Power BI and Business Central are integrated, you will most likely need to build new reports. This article is not going to teach you how to use Power BI, but it will demonstrate how to connect to your Business Central data. Read on for the steps to get data from Business Central.
While it’s possible to create reports beginning in the Power BI web service, this article is going to focus on using Power BI Desktop. In many situations, Power BI Desktop is the preferred tool for creating reports. As an example, check out the “Create your first Power BI report” video from Guy in a Cube on YouTube about how to create your first Power BI report
With Power BI Desktop loaded, select Get Data from the toolbar. Search for “Business Central” and select it from the list of sources. In this article, the online version of Business Central is being used. The on-premises version and how to connect to it are not covered in this article.
 Figure 13 Power BI Desktop search results for Business Central.
Since this may be your first time connecting to Business Central, you may be asked to sign in.
 Figure 14 Prompt to sign into Dynamics 365 Business Central from Power BI Desktop.
Select Sign in and then enter your Business Central credentials.
You will be presented with a window displaying the various Business Central environments.
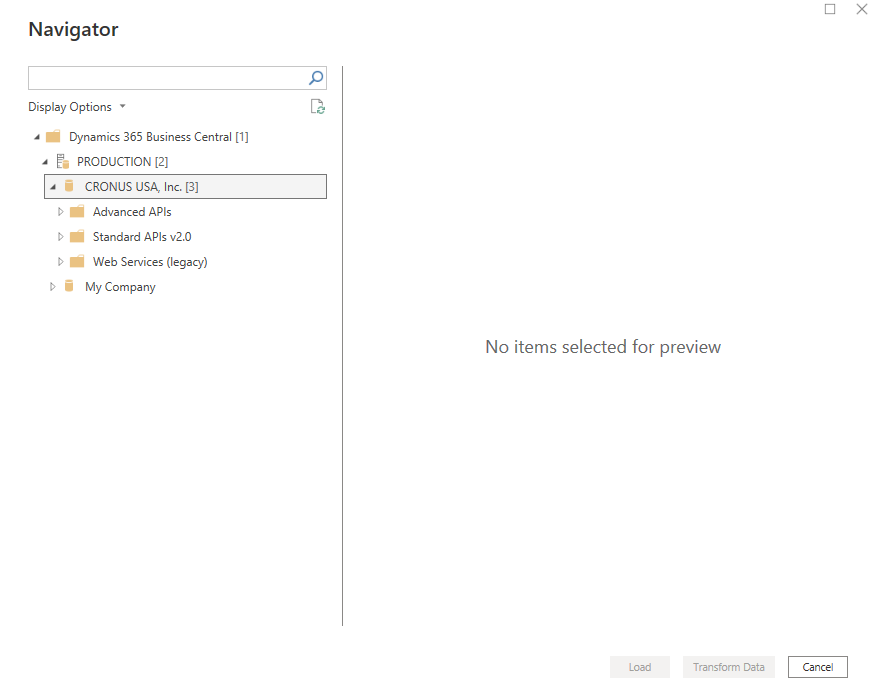 Figure 15 How to select a Business Central environment.
There are several articles that go into the details of Advanced APIs, Standard APIs v2.0, and Web Services (legacy). Review the Microsoft Learn documentation for detailed information. For the purposes of this article, the Web Services (legacy) option is being selected because it provides the most flexibility.
Select one or more objects. Then, select Load. (Most of the time, the Transform Data option is preferred due to many reasons, like applying filters and removing unnecessary columns. For more information, please contact us at Forvis Mazars for information on how to use this option with your Business Central data.)
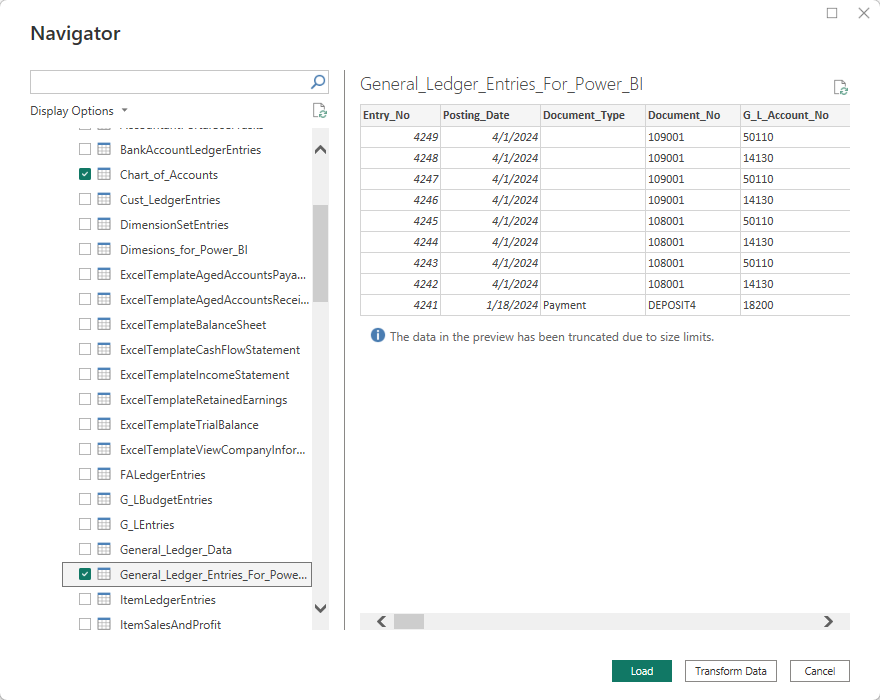 Figure 16 Two objects selected and data loaded.
If you have selected more than one object, use the “Model” view icon to create the joins between the objects. For example, the Chart of Accounts should be joined to the General Ledger entries.
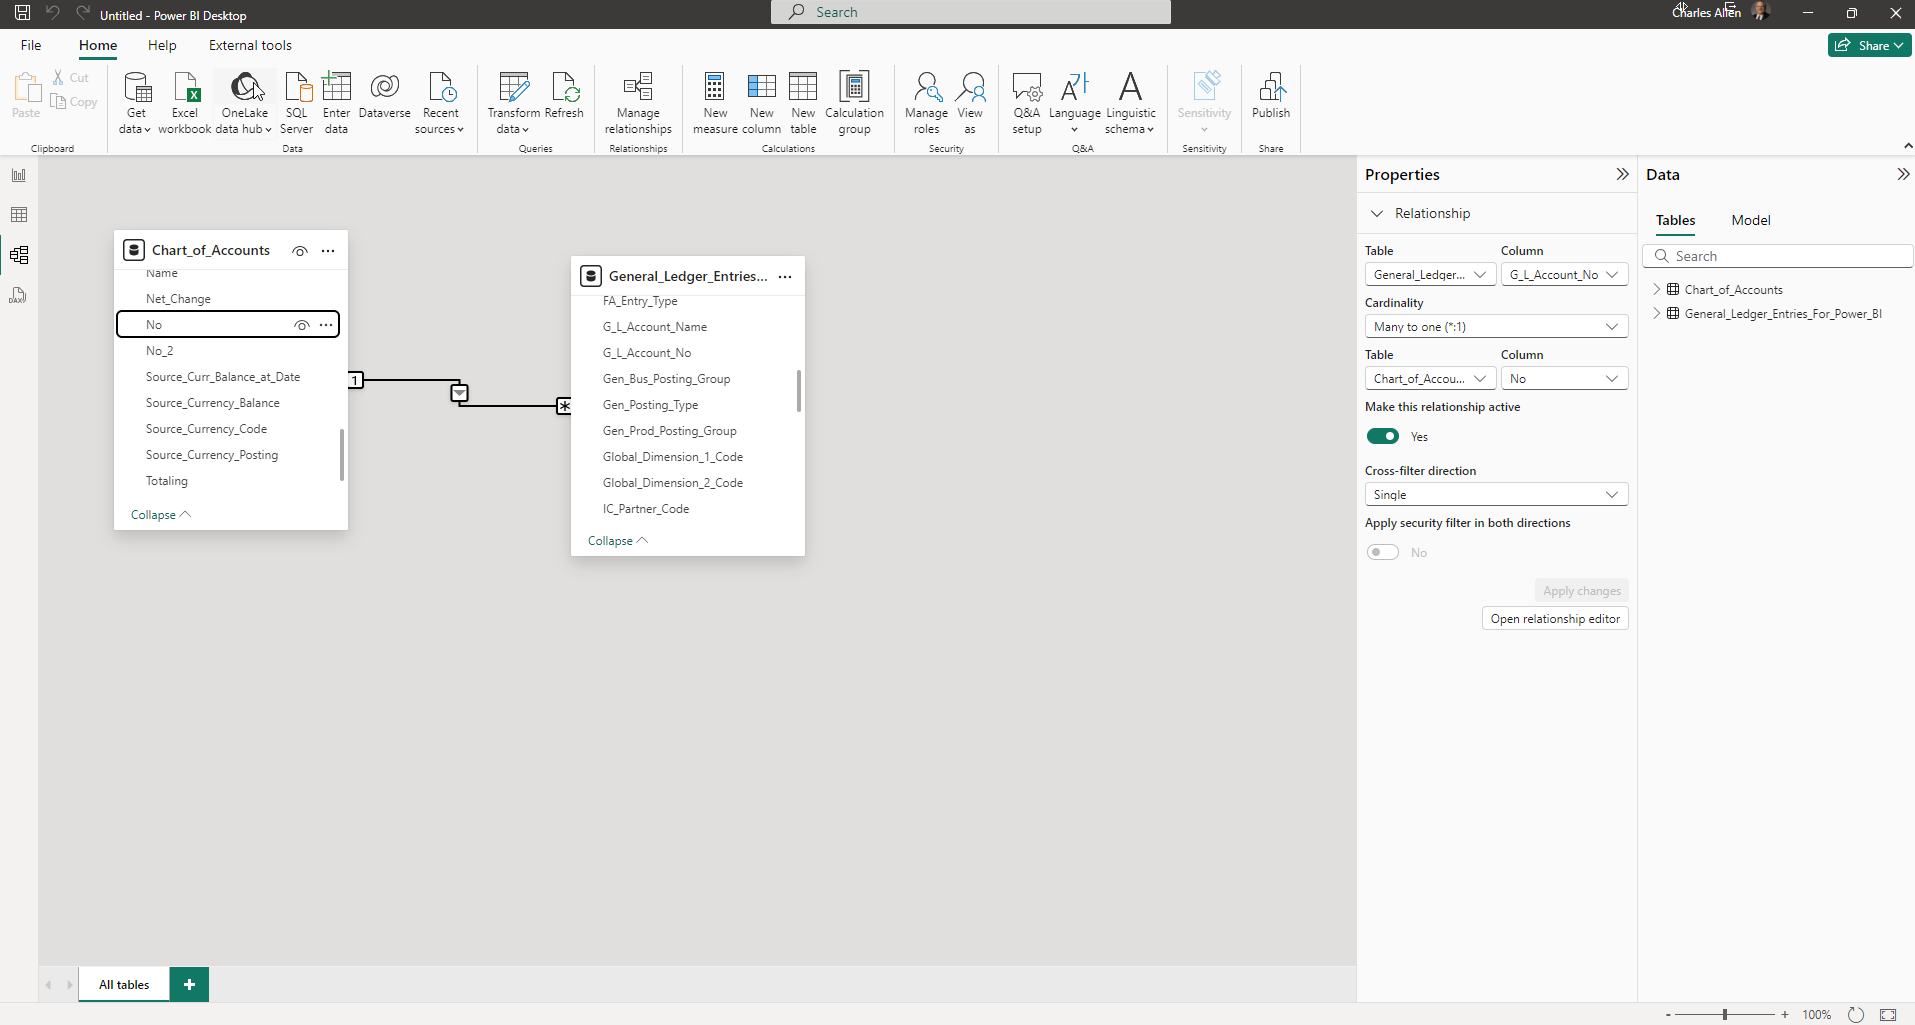 Figure 17 Screen showing how the Chart of Accounts should be joined to the General Ledger entries.
Once the data model is set, you can build a report like the one shown in the next image.
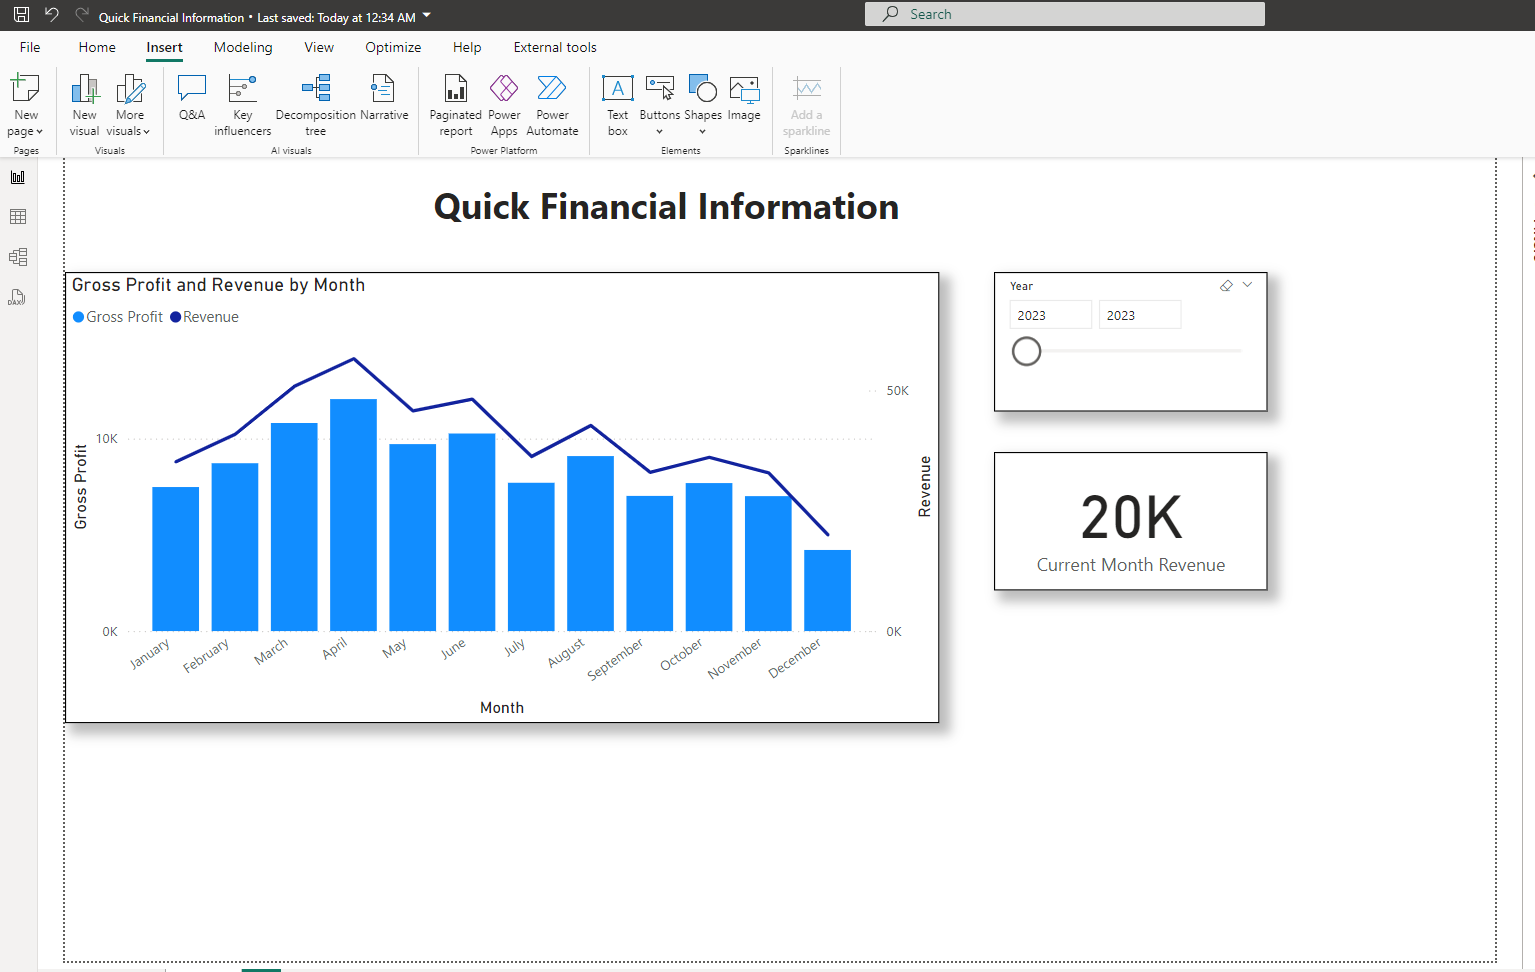 Figure 18 Report showing quick financial information.
With the report created, it’s time to make it available to others.
Publishing Power BI Reports to the Power BI Web Service
Make sure you have Admin, Member, or Contributor access in Power BI. Talk to your administrator if you do not know your access. Select the Publish button on the toolbar.
Create a new workspace in Power BI web service to contain your report. You may want to create different workspaces for different audiences or types of reports, like Finance and Sales.
Once the report is published, you can view it in Power BI or use the “Get Quick Insights” option to ask questions.
For now, let’s go full circle and view the report in Business Central.
Select Got it from the window shown next.
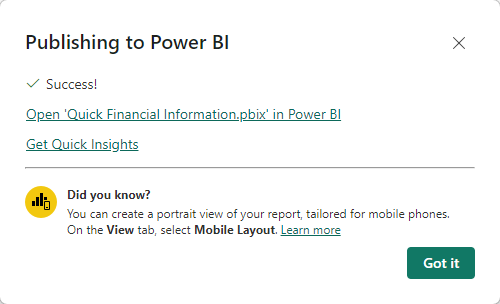 Figure 20 Publishing to Power BI information window.
Go back to Business Central and the Power BI part.
From the dropdown menu, click on the “Select Report” option. Select the report from the list. The report will appear. (Remember you can view a larger version of the report by selecting “Expand” from the dropdown menu.)
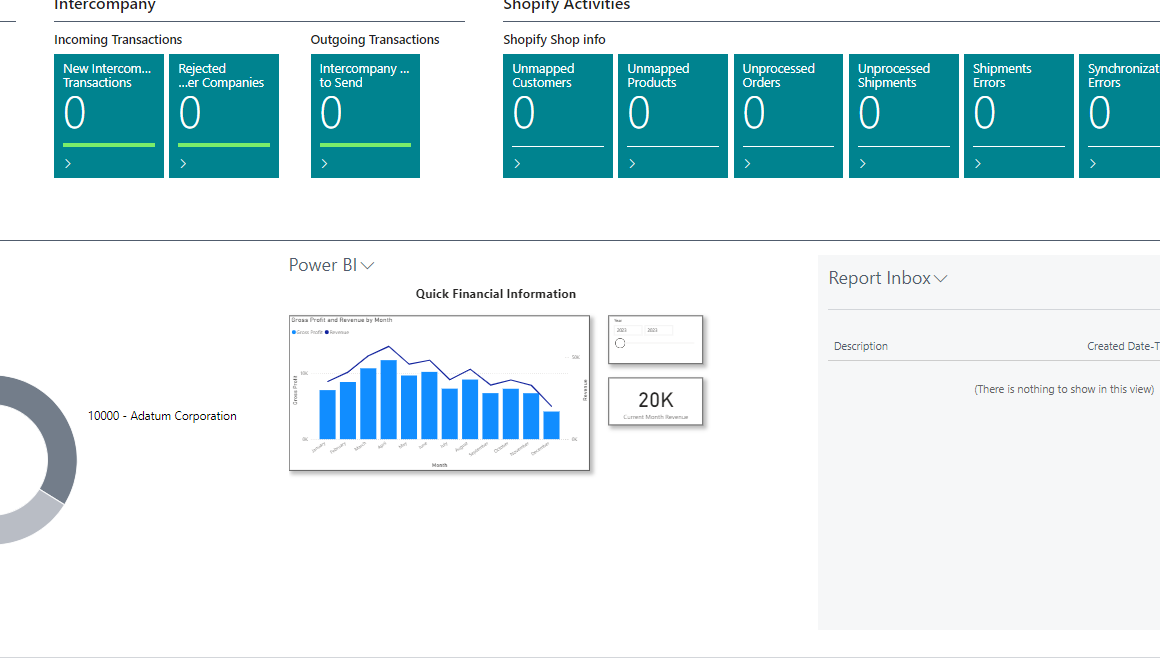 Figure 21 Viewing the Quick Financial Information Power BI report in Business Central.
Conclusion
This article has covered how to integrate Power BI and Business Central, as well as how to create reports with Power BI that display Business Central data. While there are many more subjects that can be covered, this article can help you get started using Power BI with Business Central. If you have any questions, please connect with us to learn more or schedule a personalized demo.

