Have you ever wished you had different information available in Microsoft Dynamics 365 when selecting a record for a lookup field? Learn how to customize lookup views in Microsoft Dynamics 365 customer relationship management (CRM) here. Below are two options that can help you improve the user experience when choosing a value in a lookup field.
The first option is to customize the standard lookup view available for almost every Dynamics 365 CRM table.
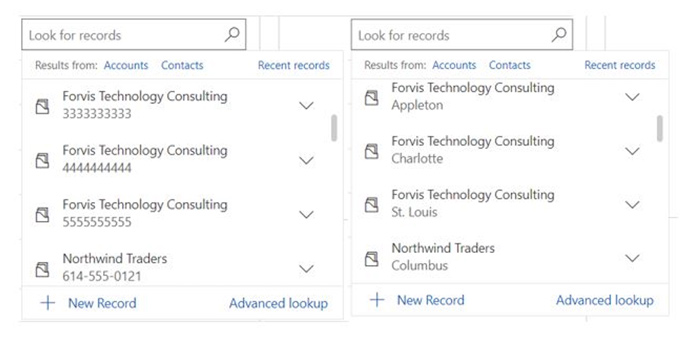
Let’s look at how this might work for the Company Name lookup field on a contact form. The out-of-the-box lookup view for Accounts shows the account name, the account email address, and the main phone number.
When Accounts have the same name or corporate email address, this often is not sufficient information to choose the correct Account. Notice the difference below between the standard view on the left and a modified view on the right. Making a simple change to include the city—instead of the email address—greatly enhances a user’s ability to choose the correct Account.
Here’s how to make this change:
- Navigate to make.powerapps.com.
- Make sure you are in the environment you wish to update:

- Select Solutions in the bottom of the navigation pane to the left.
- Either select the solution you are working in or create a new one:
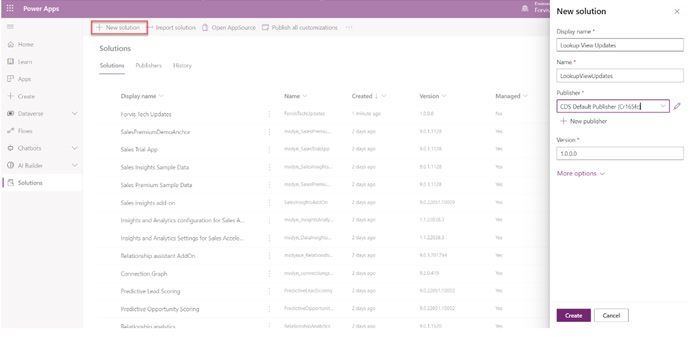
- Click on Add existing and select Table:

- Next, select the table on which the Lookup View is built and click Next. For this example, we will use the Account table:
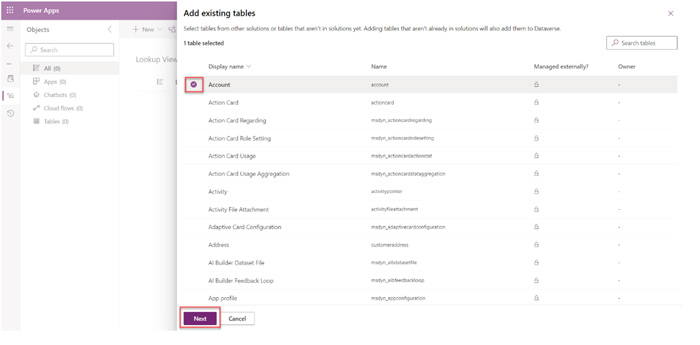
- Then, click on Select objects:

- Navigate to the Views tab and select the Lookup View you wish to edit. Note: There may be multiple Lookup Views for the same table. Once selected, click Add:
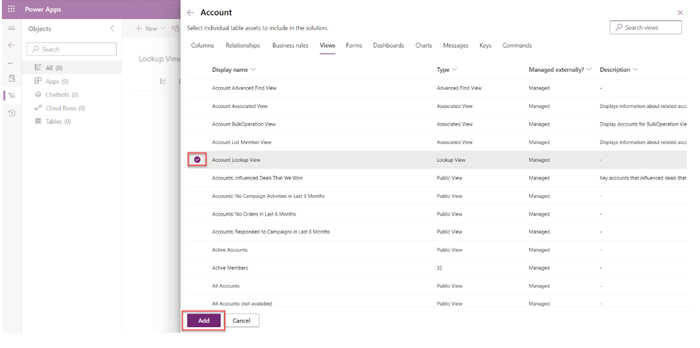
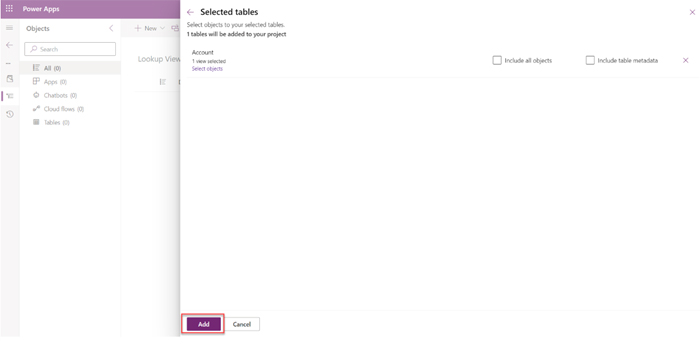
- On the Selected tables screen, click Add once more:
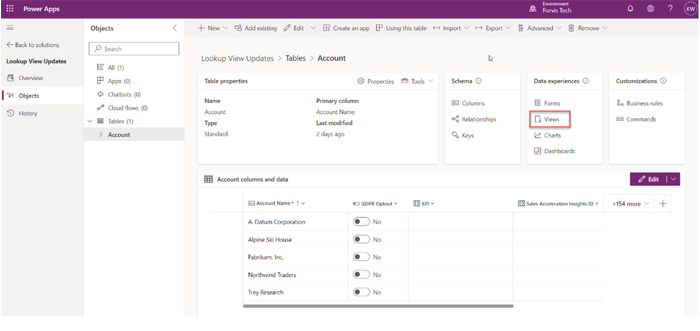
- Click on the table with the updated Lookup View (for this example, Account) to expand the options:

- Navigate to Views under Data experiences:
- Select the Account Lookup View or whichever view you would like to edit.
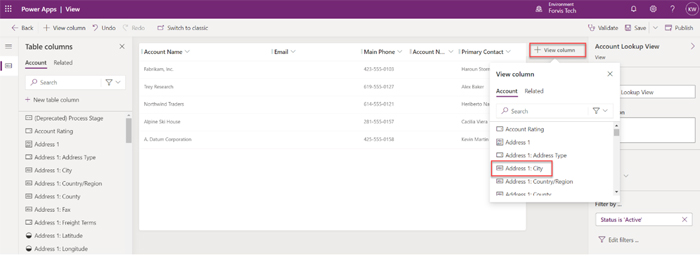
- Add a View column, then find and select the field you would like to add. In this case, we will use Address 1: City.
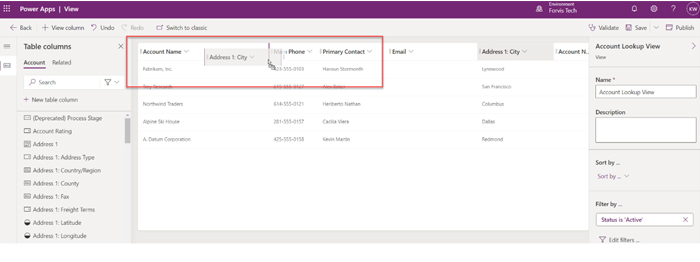
- Drag the newly added column just after the Account Name column:
- Now Save and Publish.

Here is a second option to customize lookup views in Microsoft Dynamics 365 CRM.
For many lookup fields, you have an option to change the default view for that lookup field. Let’s review how this could work on an opportunity form with an Account Lookup Field.
By default, this field would use the Account Lookup View and we would see results similar to this:
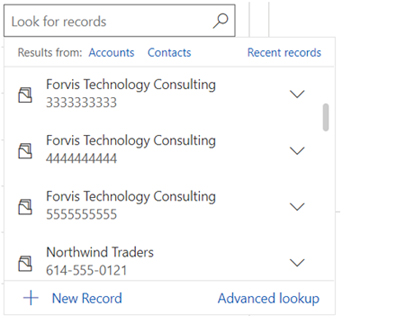
We could modify the lookup view as we did in the first option; however, this modifies the lookup view for Accounts everywhere in CRM. Perhaps for Opportunities, we need specific information or specific filters so users select only valid options for Accounts.
An appropriate solution in this case may be to create a custom system view to meet specific requirements. For example: New Opportunities should only be added to Accounts not on credit hold and that have preferred customer status. We can construct a system view that would have filters like the following:
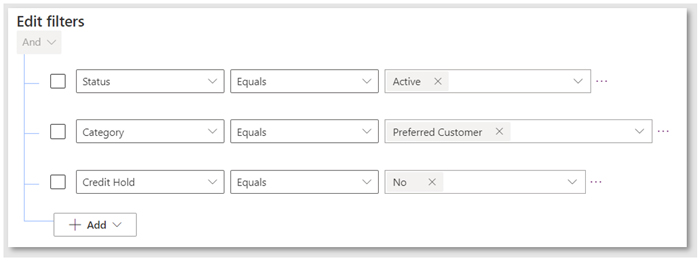
Then, similar to the lookup view, we can determine which data fields will be visible initially to CRM users for the Account field on an opportunity form.
In this example, we want to see the company name, city, and account number. So, we customize the default view for the Account Lookup Field on the opportunity form to utilize this new view:

Spending a little time adapting and creating views for lookup fields can contribute to improved user acceptance rates and data accuracy. Both are key to getting return on investment from CRM.
With these tips, you now can customize lookup views.
Need assistance with customizing your CRM? We’re here to help. Reach out to the Business Technology Solutions team at Forvis Mazars or use the Contact Us form to discuss your CRM needs and goals.
